Open topic with navigation
Step 2: Add New Blocks and Move Existing Blocks
Test Flow uses a drag-and-drop interface to add new blocks, move existing blocks, and also add loops and delays to the Sequence. In this step, you will learn how to add new blocks to the Sequence and move existing blocks to new positions within the Sequence.
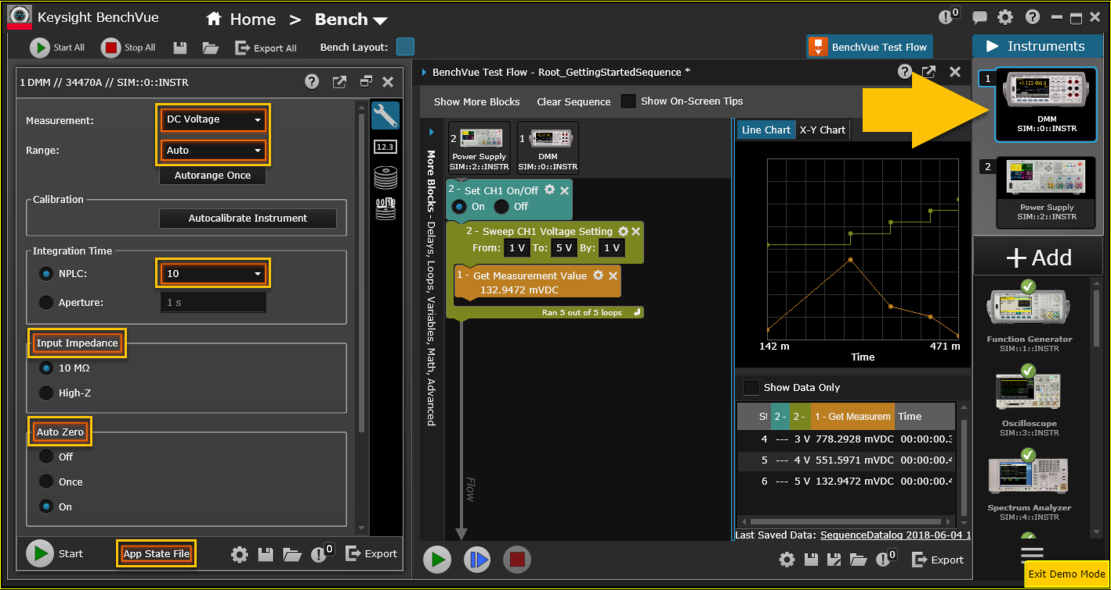
- From the BenchVue Instrument Panel, select the DMM application by clicking on the corresponding instrument icon. From the DMM application, notice that certain controls and properties are outlined with orange rectangles. These identify the operations that can be used as individual Blocks within the Sequence. The controls and properties supported will vary depending on the instrument and model number.
Note: Some PathWave applications support Test Flow feature. To use this feature with your PathWave application, be sure to launch the application (in a separate window) and enable the "BenchVue Test Flow" on the application. From the PathWave appliation, notice that certain controls and properties are outlined with orange rectangles and you can now follow the subsequent steps at below to perform the Test Flow operations.
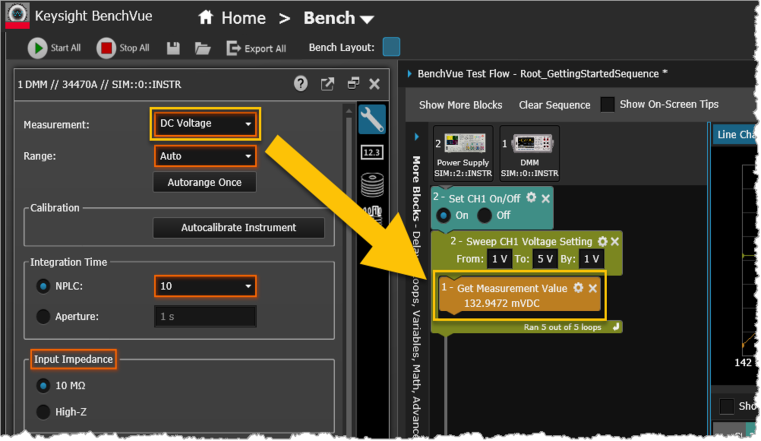
- To add a block to the Sequence, all you need to do is use your mouse to drag-and-drop the control over to the Sequence Workspace. For this example, drag a measurement function control from the DMM application and drop it in the Sequence Workspace, within the existing Sweep block as shown below.
Note: The color of the new block may vary from that shown below.
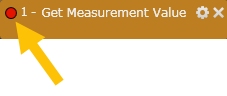
Note: A red circle in the upper left corner of a block indicates a breakpoint in the Sequence. For more information on setting and removing breakpoints, see Set Breakpoint.
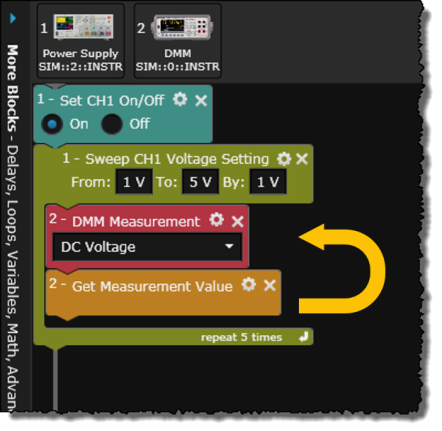
- From the new block, labeled "Set Measurement Type", click on the Settings menu in the upper right corner to change the block settings. Change the block title to "DMM Measurement" and the block color to red. If desired, add a descriptive comment to this block. Click OK.
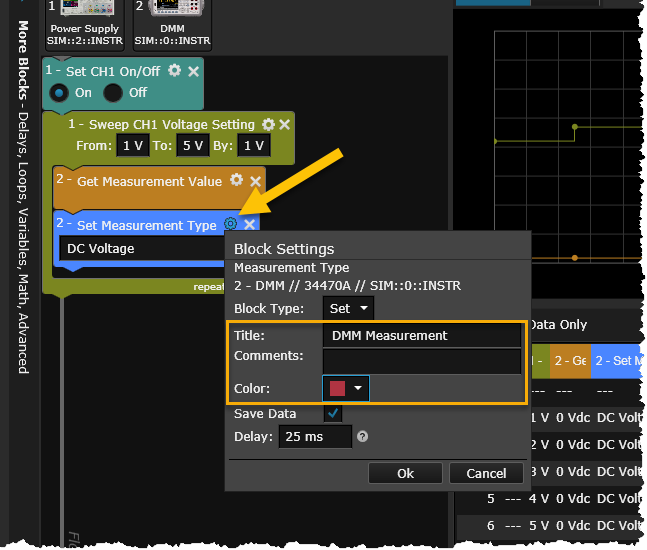
- Within the Sweep block, drag the red "DMM Measurement" block and drop it immediately above the "Get Measurement Value" block. Since the blocks are executed in order from top to bottom when the Sequence is executed, this will ensure that the DMM function is properly configured before the measurement is taken.
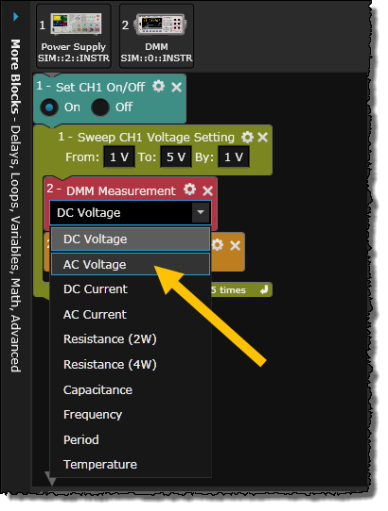
- Change the DMM measurement function to "AC Voltage".
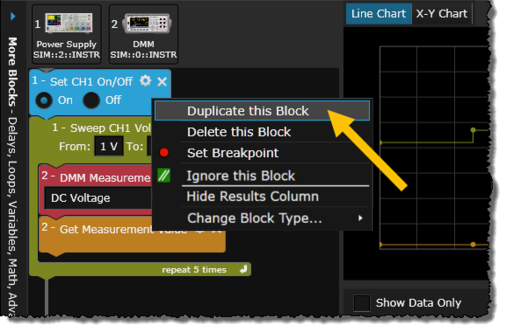
- For this example, we want to enable the Power Supply's channel 1 output at the beginning of the Sequence and disable the output at the end of the Sequence. Since the Sequence already contains an On/Off control for the Power Supply, we will simply duplicate this block. To do this, right-click on the first block and select "Duplicate this Block". The new block is added immediately below the first block.
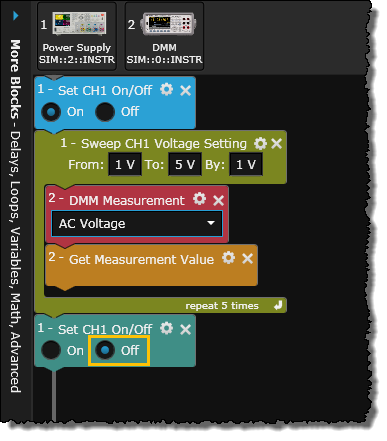
- Now let's move the new On/Off block so it is the last operation within the Sequence. Drag the block and drop it at the bottom of the Sequence as shown below.
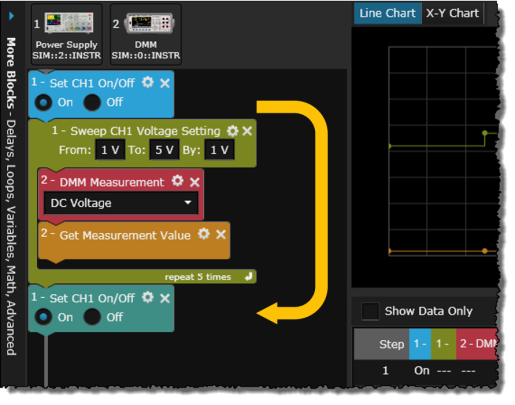
- In the On/Off block at the bottom of the Sequence, disable the Power Supply's channel 1 output by clicking the "Off" button.
In the next step of this tutorial, we will modify the loop parameters for the Power Supply's Sweep block, save the Sequence to a file, and then execute the Sequence.